Saturday, May 14, 2011

Links I Like

Hello hello! Just popping in to add some info regarding Regency menswear that I've come across the last few months. Some of these links cover extant garments, some are historical reproductions. They're all useful to look at if you're thinking of making a gentlemen's outfit. I've organized the links by garment type, so there are a few repeats if a post covers multiple topics.

**If anyone would like me to remove the link to your site, please contact me and I will be glad to do so.

Here are the awesome blogs these resources are from, in no particular order. These blogs contain a lot more info than I've linked to here, so go poke around on them!
Jane Austen Today
Two Nerdy History Girls
Romantic History
A Tailor Made It
Drunk Tailor
Mackin-Art
Mme. du Jards Atelier
A Fashionable Stitch
Wearing History


Tailcoats

Shirts
18th C. Men's Shirt - including an explanation of why they were so long!

Waistcoats

Breeches & Trousers
Waistcoat and Trousers (repeat from above)

Accessories

Buttons & Buttonholes
Buckles and Buttons (repeat from above)

Tuesday, January 25, 2011

Jane Austen Evening 2011 - Menswear Recap

The men pulled out all the stops this year at the annual Jane Austen Evening! The ladies looked lovely, as always, but I thought the men really stepped it up. I've got a few pictures to share of the dapper men - but I missed quite a few, there were too many good-looking gents!

And first, what you've all been waiting for...drumroll please...

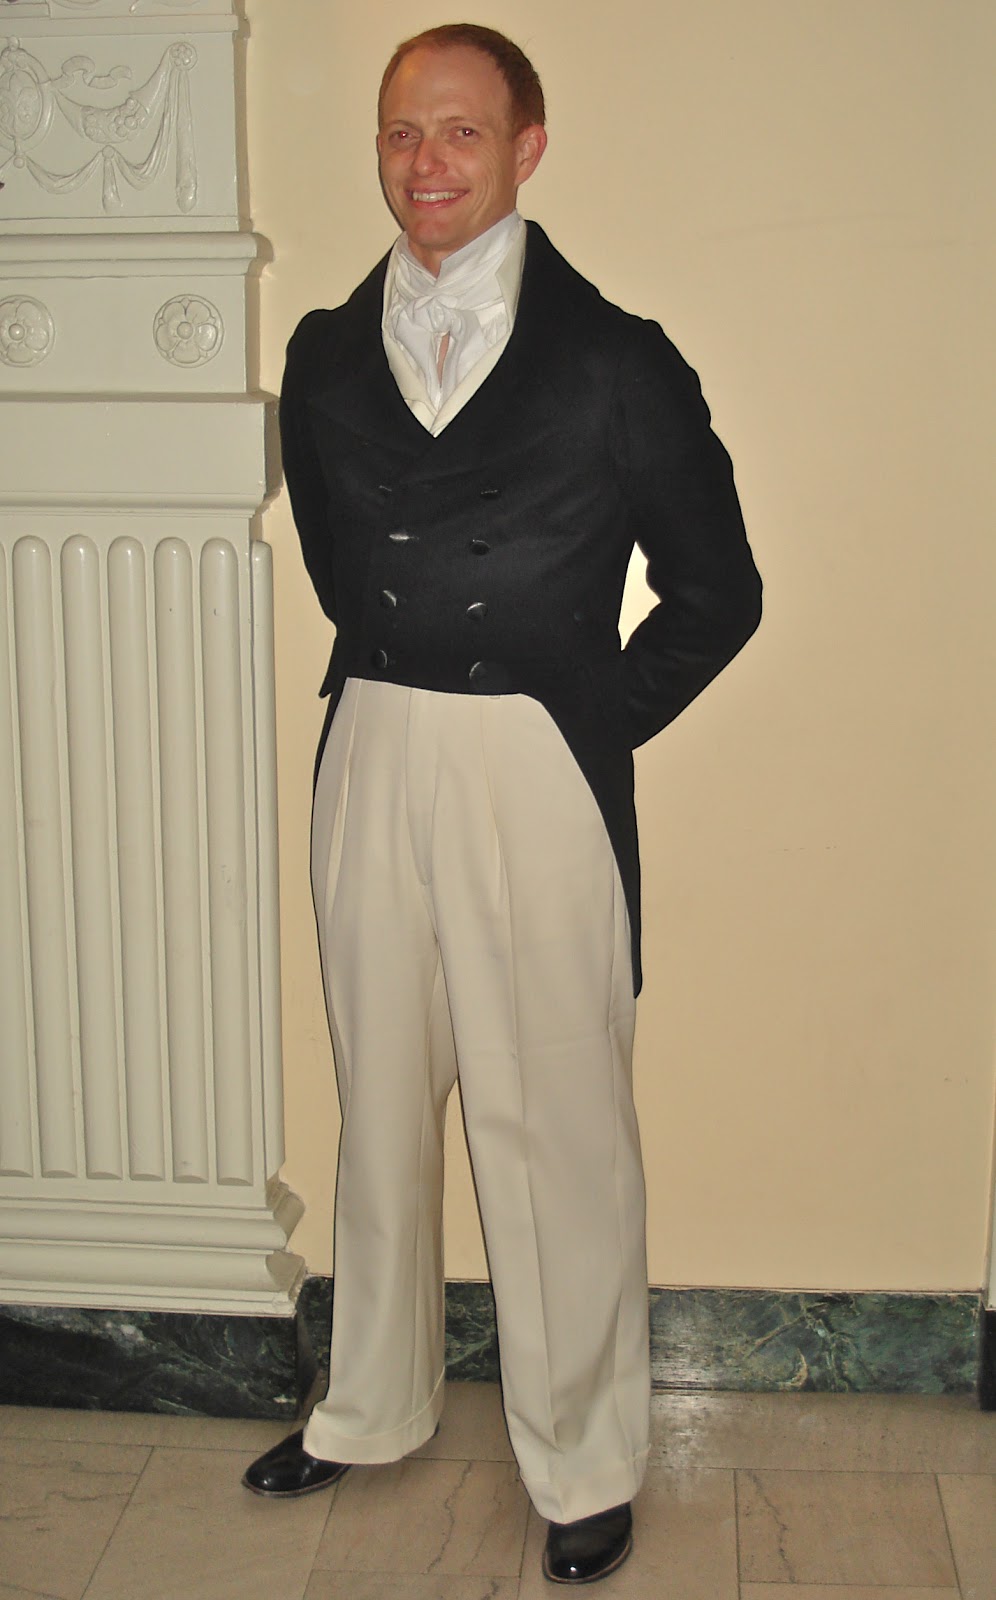
Chris in his suit! Here he's got on his tailcoat, waistcoat, shirt and cravat. You can see the little ventilation hole in the shirt that he insisted on leaving open lest he die from the heat. The 1930's pants were a big hit - lots of men were wearing modern pants, and he even got a few compliments on them.

 The annual meeting of the Tolerant Husbands Society. This Society is also open to any male friends or brothers that one might be able to bribe with cookies.

Look at the fabulous fit on this outfit! You have to be confident to wear it, that's for sure, and he was quite snazzy. I like the shirring at the sleeve cap. 

I snuck a back view - since he was gracious enough to pose for the front, I figured it was okay. :o) 

Another Chris! This gentleman sews his own clothes (maybe sometime I can get mixed up and bring him home instead of mine? Nah, we'd just fight over the ironing board or something). He's the mastermind behind this Royal Naval uniform that I've drooled over many times - I was so excited when I saw him walk by and had to go over to introduce myself!

I got a closeup of his neckcloth, very impressive! Chris said he used rice starch on his cravat, and Lauren realized that he used the Perfect Pleater for his shirt ruffles. I found his post on the rice starch on the Regency Society of America message boards, where he is a frequent poster, and I'm sure would be willing to answer any questions you might post. I'll probably pop over with a few of my own!

 Undoubtedly the cutest young gentleman at the Ball. Look at those stockings!

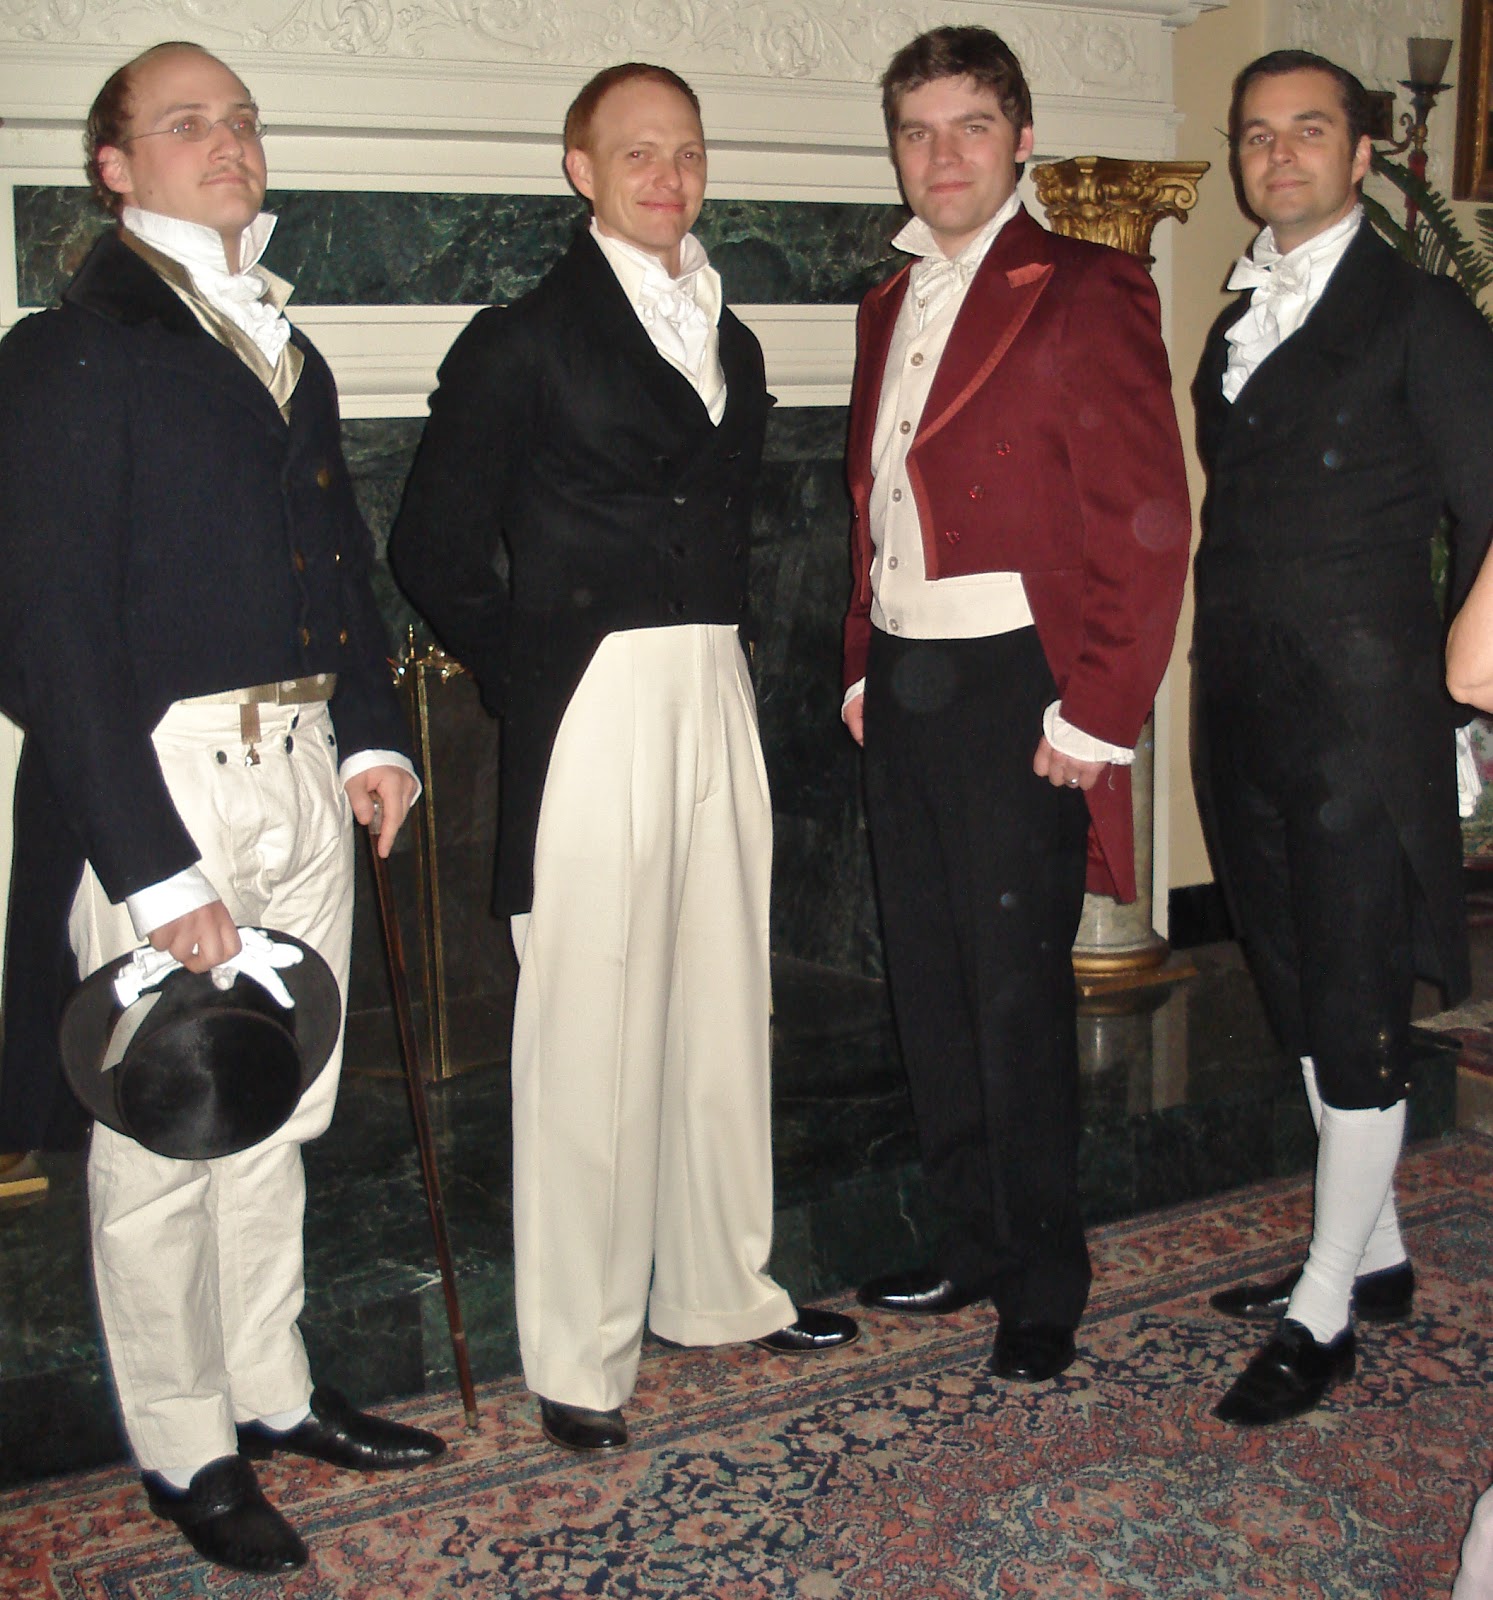
These next two outfits might be my favorites of the night, for sheer ingenuity. These men were accompanied by lovely ladies who deconstructed and repurposed thrifted suits, and turned them into incredible regency wear. What a great idea! you get all the fun of making cool collars etc, without having to make the icky welt pockets! (And they were quite well-done too - it wasn't until I was told *the secret* that I saw how they were remade!)

Another repurposed Regency suit, and the fine lady who made it. 

Showing where she pieced the tailcoat together - cut a little off the front, add it to the back, and voila!

And here ends my menswear recap...don't worry, I know I still owe you a review of the waistcoat I made, and probably a couple other things... :) If you want to see the tasty cookies from the event, pop over to V is for Vintage and say hi!

Thursday, January 13, 2011

W is for Waistcoat

I wasn't joking when I said things were going to slow down around here, was I? :) I've been working away, finishing up all the little odds and ends like buttons, hems, etc., and finishing my gown. I've posted about my dress on my new all-purpose blog, V is for Vintage - so if you're interested, please check it out over there!

A couple nights ago I had Chris put on the whole outfit as a first "dress rehearsal". Remember how I was talking about trousers a couple months ago? They're about halfway finished, and we fit them, but he was feeling a little nervous about wearing them. It's a lot of costume to try out all at once, which I completely understand. We decided that instead of him wearing the new trousers, he'll wear some cream high-waisted 1930's style pants he already has - they're fly-front, and the legs are fairly wide, but so what. (kinda funny that he'll be more comfortable in those kooky pants instead of the other kooky pants, but that's how it is. :)

Now that I'm off the hook for his trousers (for now), I think I have time to slap together a waistcoat. It'll be mostly hidden under his coat and I'm just using random fabric from the stash, so I'm just cutting into it without fitting it first. Funny enough, the only appropriate fabric in my stash was the leftover cream wool from abovementioned 1930's pants, so he will be well-coordinated!

Like the shirt and trousers, I'm using the waistcoat pattern from Kannik's Korner. Once I get all three sewn up, I'll be curious to see how well they all fit together (do the top of the trousers meet the bottom of the waistcoat, etc.)


I'm making View C1. Because that's the most dashing.

During the "dress rehearsal", I had him put on a vest from his closet , and I marked where the front of the tailcoat hit. We both decided that his waistcoast shouldn't be too long (not more than an inch or two longer than the front of his tailcoat), and comparing the pattern to the vest, it will be shorter than the tailcoat. That's fine, so we're leaving it alone. Quick and dirty!

Don't forget to account for seam allowance
if you compare a pattern to a garment!

Sunday, January 9, 2011

18th C. Menswear Patterns from LACMA

Reposting this link from the fabulous Two Nerdy History Girls Blog. LACMA has posted free annotated pdf files online of patterns from their new costume collection - similar to the patterns from Tidens Toej, but these have notes in ENGLISH!!

1790's Tailcoat pattern for FREE!

Included are patterns for a men's tailcoat, 2 waistcoats, and a banyan (just learned that term - thanks Lauren!). I'm trying really hard to be happy that they chose all menswear for this project... ;)

Thursday, December 30, 2010

2010 New Year's Resolution

A trend among bloggers is doing a year-end review and rundown of their work for 2010. I'm not doing this, but it made me think about my 2010 New Year's resolution - my only resolution was to make a tailored jacket. Originally I had a completely different project in mind (a practice jacket where I didn't have to worry about it fitting someone!), but as the year wore on, I chose to make this tailcoat instead.

I still have a lot to learn about tailoring, and a lot of techniques to refine and practice, but now I have taped a roll line and tried padstitching - albeit by machine, but it worked out pretty well. I'm proud of how the jacket is looking, and proud that I'm meeting my deadline!

Shears! I mean, Cheers!!
Thanks for joining me on this journey - here's to having more fun in 2011!

Sunday, December 26, 2010

Sleeves

More progress! I've done the sleeves and the sleeve lining, so we're getting close!

I basically flat-lined the sleeve instead of doing a traditional lining - I put it in to prevent the elbows bagging out during wearing than anything else. I did the inside of the cuff with my self wool, since Chris wants to turn the cuff back sometimes.

Sleeve & Lining, Inside View
The sleeve and the lining are sandwiched inside the cuff, and I finished that seam before attaching it to the jacket. I did have to handstitch the lining to the jacket though, and I want to show you a setup I like for handsewing:

Rather than holding the garment in my lap and crouching over it, I like to sit at the ironing board so the garment's weight isn't on me, and so it's closer to my eyes. I find it much more comfortable for long sewing sessions. Sorry I'm never in any pictures, but I do a lot of my sewing before Chris gets home, so there's no one else to take pictures!


And here it is, with his pirate shirt on underneath. Hopefully he won't be wearing low-rise Banana Republic chinos...that was a failed experiment. The sleeves are intentionally long to accomodate the turnback.

Now it's just the faux pocket flap, buttons, & buttonholes! (But boy do I hate buttonholes.)

Thursday, December 23, 2010

Christmas Greetings and a New Blog!

I was poking around the internet looking for vintage Christmas images, and found this article on Wikipedia about the first Christmas card - it was created in 1843, and with the reformed Penny Post in London to help it along, the idea quickly gained popularity. Here's the image of the first Christmas Card:

Very Merry Indeed! (even the child in the center gets to join the festivities!)

In other news, I've decided to start a new blog - V is for Vintage - where I'll be posting about everything not relating to Regency Menswear. (I didn't want to have to stop blogging when I take a break from sewing for Chris!) I hope you'll join me over there.

Don't worry, I'll still be updating this blog, especially in the next few weeks!